Main menu
You are here
Running models : Working with visualisation tools : Grid
Spatial grid display helper
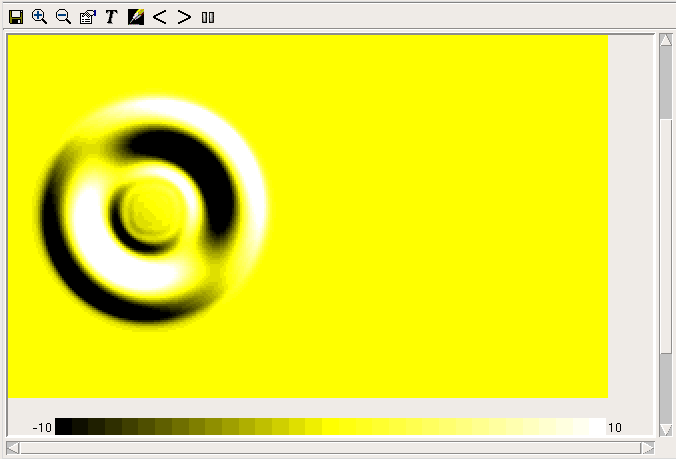
The spatial grid display colours a two dimensional rectangular grid according to the value of a specified variable within each grid square. It is typically implemented using a multiple-instance fixed membership submodel.

Positioning the grid squares
When you add a helper of this type, you are first requested to supply a variable to use as the colimn ids. This variable must have the same number of values as the one that is actually to be displayed, but it is only used to calculate the dimensions of the grid. The grid will have one column for each discrete value in this variable (e.g., if the values are 1,1,1,5,5,9,9,9,9 thenthere are 3 discrete values, 1, 5 and 9). The number of rows will be the total number of values divided by the number of columns. The actual values are unimportant.
You are then requested to supply a variable from which to get the values for the square colours. This variable should have the same number of values as that used to define the columns. If there are more values, the later ones will be ignored. The values are placed in the grid starting at the bottom left corner and going across to the right, then filling the next row from the bottom and so on. If there are fewer values than the number of cells in the grid, they will be used again to fill the rest of the grid.
Zooming and scrolling
The + and - buttons in this helper enlarge and reduce the displayed grid, in steps of one pixel per grid square. When the grid extends beyond the boundaries of the display port, you can use the scrollbars at the borders to bring various parts of it into view. Note that the colour legend will always obscure part of the grid if you can scroll perpendicularly to it. To see all of the grid, you can move the legend between the bottom and the right of the display using the "Orientation" radio buttons in the helper's properties dialogue. The 'Save' button will save an image showing the legend and visible part of the grid, in the format indicated by the supplied file extension.
Choosing colours for values
The legend shows which colours correspond to which values from the variable. It has different colours over a certain range of values. The range can be increased or decreased with the < and > arrow buttons in the toolbar, or it can be set exactly using the "Scale range" entry fields in the properties dialogue. If the data variable is boolean or enumerated type, there will be one colour for each of its possible values. If it is an integer, there will be a different colour for each value in the range, up to 100 colours. Otherwise, there will be 33 colours corresponding to smaller ranges of values within the whole range. Values outside the range are shown in the colour for the nearest end of the range.
For numerical values, there are initially three colours for low, middle and high, (black, yellow and white in the image above) with other colours fading between these for other values. This arrangement can be changed using the colour map editor.
Viewing and changing information
The grid display normally updates as the model runs, but can be frozen by clicking the "Freeze" button at the right of the toolbar (this feature is left over from the days when the graphics took a long time to update; these days they are very fast).
Clicking on the display gives a popup with the column and row number of the grid square in which you clicked, plus its value (which will be approximate if the display is using colours to represent ranges of values). Dragging produces more poups for each grid square entered. Hovering over a colour in the legend shows what value it represents.
The grid helper can also be used to set the values of model parameters. This does not work for variables other than parameters. Click on the "enter edit mode" button (with the pencil icon) then click on the colour legend to select a colour to "paint" onto the grid. Click on the legend again to paint a new colour. Changes made to parameter values in this way will not take effect immediately; the same rules apply as for changes made with the slider helper.
Saving information as GeoTIFF
The second tab in the properties dialogue allows the grid to be saved as a GeoTIFF (for more information see section on loading GeoTIFF data). To use this tool you must have the GDAL library installed on your computer. Load a template file from which to copy the georeferencing data, then save a new file using the data from the grid. This is useful if you have parameterized your model with data from GeoTIFF files. You can also choose to have a file saved at each display interval after the grid data is updated; the time value will be appended to the chosen filename.
A three-dimensional view of a rectangular grid is also possible using the 3d viewer.
In: Contents >> Running models >> Working with helpers
- Printer-friendly version
- Log in or register to post comments
